Showing posts with label alphabet wall stickers. Show all posts

Thursday, September 1, 2011

Teaching??? Alphabet Wall Stickers Are Just the Beginning...

Are you a teacher? Maybe you're a homeschooling Mom. Or, maybe you're a little of both and want to give your kids a head start on learning. If so, I think you'll be excited to see the NEW peel and stick, educational kids decals that are available now at Kids Decal Corner!


Between chalkboard stickers and USA / world maps and dry-erase calendars...
 

 Alphabet wall stickers are just the beginning to all the fun kids can have while learning!


Here are some of my favorites:
This interactive USA map has peel and stick states to help kids learn all 50 states of our great, big United States :)
The individual states can be stuck and re-stuck over and over without loosing their sticky. The repetition is a wonderful asset to learning.
This particular United States Map Kids Decal is 28x18 inches. A removable, re-usable teaching tool.


Measuring 24x36 inches, both the United States map and the World map are both dry-erase! What's not to love??
These maps are great not only for schools, but for homeschooling, offices, libraries, cafes or just for cool wall decor in your den!


Speaking of dry-erase, this packed of dry-erase kids decals are sold 3 per pack, measuring 9x13 inches. Great again for anywhere you are teaching or kids need to practice penmanship or older kids need to keep track of their school assignments or sports schedules. We have a variety of dry-erase products; come check them out. You won't be sorry!!


Need to teach your toddlers their ABC's or numbers... we have lots of alphabet wall stickers to fit just about any style and taste! Here are the most popular decals:

And here is my personal favorite:

I have these Colorful Alphabet Wall Stickers in my house - they're amazingly durable and adorable!!! My kids love them.


Well, that's what's NEW and exciting at Kids Decal Corner, in the educational department! So to all the teachers and teaching moms .... Happy Teaching :)

Friday, January 28, 2011

Story Book Inspired Nurseries and How Childrens Wall Stickers Can Help!

I found this idea while I was browsing the internet and thought I'd share it with all of you! It's from Better Homes and Gardens website, entitled " Storybook- Inspired Nurseries". Check out the link for the whole scoop and more great pictures.
In a few short weeks, my husband and I will be welcoming our fourth child to the family! We're  all excited and ready to meet this little one that's been "baking in Mommy's belly", as our 3 year old daughter likes to say.
Having babies and designing your own special nursery are exciting moments in a mom's life! A lot of our customers at Kids Decal Corner are shopping with nurseries in mind. And so, I thought I'd share a little inspiration to get your creativity churning ;)

I love this idea of a storybook inspired nursery! In the example from BHG, they used the book The Twelve Gifts of Birth. What I like about this idea and the pictures, is that the room can grow with the baby... it's done in colors that are suitable for newborns as well as toddlers and even teens! I will say, however, that if they had used childrens wall stickers to do more decorating, it would make their job a bit easier as they transition from one age to the next (how's that for advertising... but its true!).

Here's a few great pointer / ideas from this article:
  • Create a focal point to display the ideas of your storybook. In there example, they used the window seat and built in shelving to display the 12 love characters of this book.
  • Mix and match fabric. Don't lock yourself into "kid - themed" bedding. Use bedding and colors that can transition well from one age to the next. The pink, green, and orange plaid will work well for nursery into teens!
  • Use a quote from the book to either "create" the headboard or to decorate the wall above it. Here is where our Alphabet Wall Stickers or the Wall Wishes Quotes or Nursery Rhyme Quotes would make your job a lot easier and faster!
  • Choose furniture that can grow with your child and that provides a nice neutral background for the more exciting colors and decor of the room and bedding.
Notice the 12 characters of the book surrounding their focal point.

Here's their book quote.

Again, there are tons of kids decal options that would work great for adding some interest around a mirror like this.


If you're looking for some Storybook themed decals, check out:
Pooh and Friends Collection...

Sesame Street Collection...


And coming soon... Mickey & Friends!!

And so many others ...

Well, I hope you found this helpful.. and check out the link for more great ideas and pictures! Happy Decorating everyone!!

Wednesday, August 4, 2010

Kids Decals Make Back To School Prep A Cinch!

Wow, can you believe it's August already? Sadly, the laid back days of Summer are almost over. If you have kids, you're probably starting to make your list of all you need to buy and do before sending them out the door onto the bus.

Well, Kids Decal Corner is here to help!!! Whether you're sending off your "baby" to kindergarten or your teen to college... we've got some really cool, NEW products that can help you and your kids stay organized and stylish all at the same time!

Here are a few of our NEW kids decal chalkboard stickers from Wall Candy Arts. These kids decals are peel and stick, removable, reusable.... making them super versatile and useful! Aren't they cute?! What preschooler or kindergartener wouldn't be delighted to practice their letters and numbers on these cool shapes? Not to mention, how cool is it to WRITE ON THE WALL??!!!


My son is 4 1/2 years old this Fall, and I'm planning to start teaching him preschool and kindergarten curriculum. He loves to learn and seems eager to start. We'll see what he thinks about sitting and learning everyday. Anyways, I bought him a little desk off of Craig's list and I was thinking one of these decals would work great on top of his wooden desk. Talk about being "economical"?? We already go through TONS of paper... this way, he'd be able to practice his letters, numbers, shapes .... and then wipe it off and start all over! I'll have to let you know which one I decide to go with. I think I'm more excited about teaching him than he is about learning.

If you'd rather avoid the "mess" of chalk dust, try out our new dry erase panels and sheets!


This set of dry erase kids decals come in a set of 3 panels that are 9'x12' each. You could use them separately or put them all together for one big whiteboard. These panels are by Wall Candy Arts and sell for $19.95 at Kids Decal Corner!


This dry erase kids decal is from Roommates. It comes in 1 sheet that is 17.5'x24' long. As you can see from the photo, you can either use it as one big sheet or cut it into any shape you like... circles, leaves, flowers, teacups, .... wherever your imagination takes you!


As you can see, these chalkboard stickers and dry erase kids decals can be useful no matter what age you are!! And as you can see, these aren't just stickers for walls either... try them on lockers, desk tops, offices, kitchen cabinets, bathrooms (good way to remind your kids of their bathroom duties), or beside the phone for messages. The options are limitless! All you need is a smooth, dry, clean surface and you're good to go!

For the TEENS that are going off to college and are looking for RA approved decorations, these are PERFECT!! Here are a few of the NEW, more mature decals we have:


This particular set comes in a pack of 4 chalkboard sheets that are 19' x 24 1/2' each  OR you can put them all together for a GIANT chalkboard that is 49' x 38' . This set is sold for $59.95 at Kids Decal Corner.


These are not as organizational in nature... but still very cool for the teen going off to college or for your tween that's looking to pimp out their locker at school; Dry Erase Photo Frames kids decals. Frame your favorite photos on the wall with these kids decals. Then write a funny caption or title to each image. This set of frames comes in a pack of 3 and includes 9 tack decals and 21 tape decals. Are they not totally cool!? This set sells for the VERY reasonable price of $19.95 at http://www.kidsdecalcorner.com!


If you like the frame idea, but want more "frill"... try this set of Rose Frames Kids Decals!

Well, I hope I was helpful today in showing you just some of the fun ways that you and your kids can get ready, set, and GO into this next school year stylin' and organized! Wishing you well in your Back To School endeavors this month!


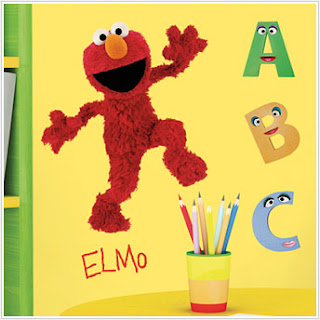
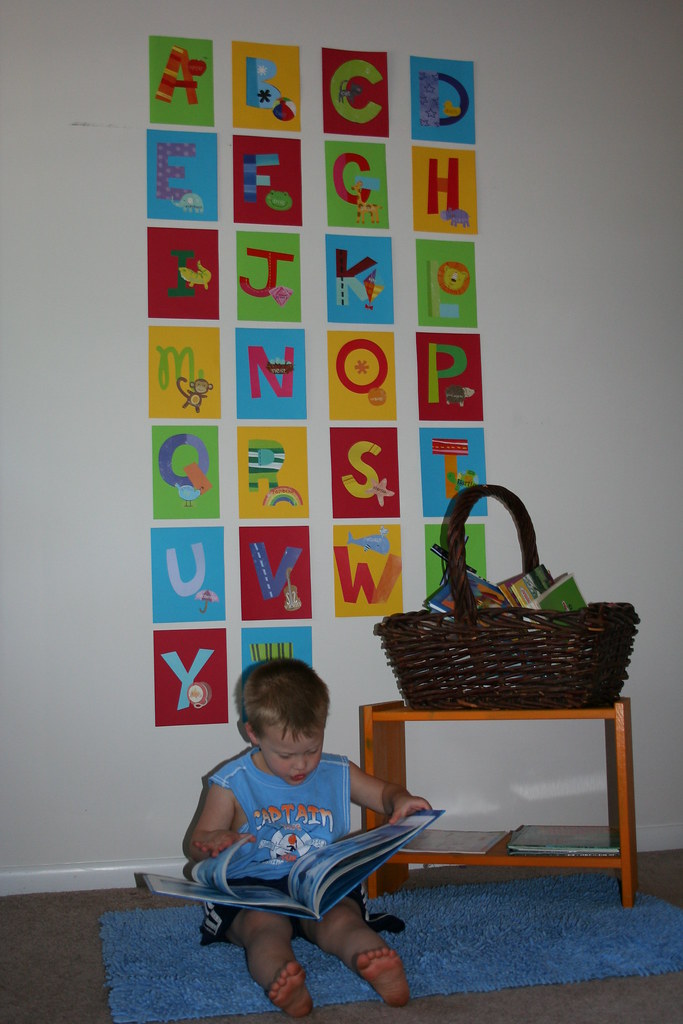
 Oh, I almost forgot... check out our collection of alphabet wall stickers for your toddler who's learning their ABC's and 123's. This is a great interactive way to stimulate their imaginations and teach them at the same time! Here are just a few of the alphabet wall stickers we carry at Kids Decal Corner!

Monday, June 21, 2010

Project - Runway: Alphabet Wall Stickers Part 2.... BIG REVEAL!

Last Monday, I gave you step by step instructions on how to use the Alphabet Wall Stickers to make a BIG impact for a LITTLE price! With a few kids decals, a little paint and a few hours of work you can have....

Drum roll please!!!!


Alphabet Wall Stickers - Part 2


A fun and colorful wall that says "Wow" !

Not only will your kids love it, but so will your wallet! Most projects that make this kind of impact can cost LOTS of money! But not this one!


Remember, you can use this same idea with any of the wall decor decals sold at Kids Decal Corner. What works the best, are the smaller, multiples per pack. But, you could also use this sort of idea with the Giant Kids Decals. Your painted block would, obviously, be much bigger than for the smaller decals.

These blocks create a visual background and border for your decals .... Making them look more "finished". Another idea for your Giant Kids Decal Blocks, is to use coordinating colors and paint varying sizes of stripes around the outside edge of your painted block. Just like you put multiple colored mats around a custom framed picture, these stripes can act in a similar manner. So whether they're bigger or smaller, they act as a great accent to your kids decal!


Budget breakdown!

    * Alphabet Wall Stickers: $23.95 ( bought from Kids Decal Corner  )
    * Acrylic Paint bought from my local Craft Store: $4.00 ( $1.00 each... used 4 different colors)
    * Painter's Tape: $2.95 from Walmart

Total money spent:   $30.90

If you have any questions about how to accomplish this project, please refer back to the instructions for Alphabet Wall Stickers Part 2.  If you still need help, don't hesitate to email me at request@kidsdecalcorner.com. I'd love to hear about your project, help you out along the way, and then celebrate your finished product with you when its all done!

So, there you have it.... Two different ways to use the same kids decal to make some fun and creative wall art! Hope you have as much fun as I did with these projects!

Stay tuned for our other fun and beautiful wall art projects.... coming down the Project - Runway!

Monday, June 14, 2010

Project - Runway Monday: Alphabet Wall Stickers Part 2

What do you get when you combine the Alphabet Wall Stickers (from Kids Decal Corner) and some cheerful paint colors???? 
A REALLY cool wall design for a really cheerful price!!!

For this week's Project - Runway Monday Alphabet Wall Stickers Part 2 .... I will walk you through how to use some cute, but simple, kids decals to make an extra BIG impact to your room.

You'll have to tune in next Monday, to get the final pictures... isn't it fun to anticipate :)

First I want to start by saying, you can use any of the wall decor decals that I sell at www.kidsdecalcorner to do this sort of project. I'll say more about how to adapt this project to fit whatever kids decal you might use next Monday.

I did this project with my future play/school room in mind. The room we currently call an "office" is more like a catch all room. But someday.... I have big plans to convert it into a playing/ learning room. However, we're far from being able to put the fun touches (like wall decor) in the room. So for now, I had to be content to try it out in my son's room. He thought it was pretty cool having all the letters of the alphabet on his bedroom wall!

The inspiration behind this project was the desire to create a large visual effect without breaking my meager budget. You can do this by painting colored blocks onto your wall to give the appearance of a collage of pictures. Follow the set by step process below and you too can create a beautiful array of color on your wall for a super cheap price! Who says you have to spend money to have a beautiful room?!

Step 1: Gather Your Supplies!
  • Level
  • Measuring Tape
  • Painter's Tape
  • Stencil Paint or samples from your local paint store would work just as well.
  • Brushes
  • Chaulk


Step 2: Planning!

Its always best to plan out your project before you start marking and painting. Trust me, it will save you time and frustration in the long run... I know from experience :)
  • Lay out all your Kids Decals and pre-determine what colors you will paint each of the blocks of color.
  • Determine how big you want each block to be.
  • Determine what distance you want between your blocks... width and height.
  • Determine where you want this collection of blocks to be positioned on your wall... making sure its centered on the wall. 
For my project with  the Alphabet Wall Stickers... I measured 2 feet from the ceiling to start my first row of blocks. Then made sure that it was centered ( left to right ) on the wall. Because I had a narrow section of wall, I decided to paint 6 rows of four blocks and then put the extra 2 alphabet blocks on the bottom left corner - making row 7 with two blocks. I made each BLOCK 3 inches apart from one another. And each ROW was 2 inches apart.


I suggest - especially if you have multiple decals and blocks - that you use scrap paper and cut it to the size of the block you plan to paint. Tape them to the wall to give you a visual of how that size will look. This way, you can play around with the size and position of your "blocks" before you start marking and painting.


Step 3: Measure, Mark and Tape!
  • Using your tape measure, start measuring your grid of blocks onto the wall. I suggest you start at the top. Measure down from the ceiling your determined distance, mark it with the chalk and then use your level to draw the line for the top of your first row. Now from your first line, measure down your determined distance for how big (long ) your individual blocks are going to be. My blocks were 8 1/2 in. long by 6 1/2 in. wide. Its easiest to do all your horizontal lines first and then measure out and mark your vertical lines. You will end up with a chalk grid on your wall.
  • Once you have a chalk grid on your wall, start sticking the Painter's tape on the OUTSIDE of the chalk lines (see picture below.... notice that the edge of the tape is on the OUTSIDE of the chalk line ).


When you're done taping your grid, it should look something like this. Notice all the blocks you've created with the tape?


 Step 4: Protect Your Edges!
If you've ever used painter's tape before, you know that often paint will bleed underneath your tape.... leaving a messy edge. I have the trick you need!!!!
Before you use the block color , use the original wall color and paint around the inside edge of each of your blocks. This will seal off the edges. So where your paint bled under the tape, you won't notice it, because its the same color as your wall.

Let the wall color dry completely.

Step 5: Paint Your Blocks!
Now using the designated colors, paint each of your blocks. I suggest using two thinner coats, than one heavy coat. Make sure you cover every spot in your taped off block (covering over the wall color that you previously painted ).

Allow the paint to dry completely. Remove the painter's tape and you will have a beautiful rainbow of colored blocks on your wall!!! Give the paint 2-3 days to set before you apply the decals to the blocks.

Step 6: Peel and Stick Your Kids Decals.
The beauty of these wall decor decals, is that you can apply them as many times as you need to until they're in that perfect spot!


Well, that's all for this weeks post on Project - Runway Monday!!! As always, I anticipate your thoughts, comments, questions or any fun and cool ideas you have!

Check us out next Monday to see the final reveal of this project!!! Plus, I'll give you the budget breakdown of how much I spent to create this amazing wall art and other ideas on how to adapt this idea to different kids decals!

Thursday, June 10, 2010

Thursday Reviews: Sesame Street is Coming to Kids Decal Corner

" Sunny Days... Keeping the clouds away.... 
Can you tell me how to get.... How to get to ...
Sesame Street!"
 All your favorite Sesame Street Characters are coming to Kids Decal Corner! These giant friends from Sesame Street can make a BIG impact to any room decor.  At 6 feet tall, Big Bird can bring a smile to your child's face and help him feel that he's always got a friend in his room! Whether you use these furry characters by themselves or create your own sesame street by using the whole gang of them.... you can easily design a room full of fun and color with these simple and affordable peel and stick kids decals.

Another fun place to stick these famous friends would be a toy room or learning room. Sesame Street is all about learning, so why not include these furry friends in your child's learning environment! A great addition to this learning theme, would be to include our Colorful Alphabet Wall Stickers! Or the Educational Alphabet Wall Stickers which offer an object for every letter of the alphabet and numbers too. Because these kids decals are peel and stick, repositionable and reusable.... they're a great hands - on way for your child to learn their ABCs.


What little girl doesn't like a little fairy magic on her wall? In the sweet colors of lavender and teal... Abby Cadabby brings lots of charm to the wall and room decor. At nearly two feet tall, she's a great addition beside a bed or "standing" on a dresser or tucked beside the door.


I think many people find painting and room designing a scary adventure, because " What if I don't like it?" ... "What if I picked the wrong thing?"... the thoughts of doubt just keep coming. If you're one of these people who finds designing a scary proposition.... and instead of doing something you're not sure of, you just don't do anything at all..... These kids decals are just the thing for you! But don't keep taking my word for it. I'll garauntee that when you buy your first kids decal ... it won't be your last! They're fail - proof! If you're not sure what color you want to paint the walls ... just take your decal along to the paint store and you can match the colors. If you're not sure about bedding, again tuck these decals in your bag and you can make sure that these childrens wall stickers will match.
If you're looking for coordinating wall decor... try using a combination of the giant kids decals plus the border. Its a simple solution to a great room. The border is 5" high and 5 yards long. Its easily cut to fit the size of your room.


And don't forget.... these kids decals aren't just stickers for walls. They can be used on any hard surface....
  • Furniture
  • Mirrors
  • Doors
  • Windows
For a fun project, try using the Sesame Street Kids Decals to make your child's own personalized art. See the Getting Creative section at www.kidsdecalcorner.com or scroll down and check out my last post, Project - Runway Monday; Alphabet Wall Stickers Part 1. In that post, I show and explain how you can make some really fun canvas wall art using these versatile kids decals.

As always... I'd love to see your creations! Don't let fear hold you back.... Let loose, have some fun and you'll be surprised just how great your room can look when you use these Fail-Proof Childrens Wall Stickers! Looking forward to hearing from you!