Showing posts with label childrens wall stickers. Show all posts

Thursday, February 3, 2011

Baby Room Ideas Made Simple with Nursery Wall Decals

One of my goals for this new year is to share blog posts of Inspiration... instead of just decal related material. However, I can't help but seeing (and suggesting) how childrens wall stickers and mural stencils can make your decorating projects faster and easier and oh so stylish!

This post's inspiration comes from Better Homes & Gardens picture/article entitled, Baby Room Details. Check out the link for the full story and lots of great pictures and ideas!

Baby rooms are so much fun to design and decorate, however there are lots of points to consider while you're brainstorming. This article is helpful in highlighting the useful, organizational, and decorative elements to a nursery.

Here's a few ideas I thought were most helpful:
  • Baskets and even towers of baskets are a great way to not only store all the items a baby needs, but they add a fun and decorative element to the room. My suggestion: Use chalkboard stickers (cut to fit a cardboard or wooden plaque) to label what's inside each basket. Attach them with coordinating ribbon. Because chalkboard stickers can be cleaned and reused, it makes it easy to change the contents of the basket and still stay organized, especially as the child grows and you need the baskets for toys instead of blankets or diapers :)
  • It doesn't have to be expensive to decorate a nursery.... in this article they suggested framing simple childrens art. I like the idea of creating themed art with the use of nursery wall decals. Check out this old blog post for making your own art using decals.
  • Pick out furniture that will grow with your baby. Corner cupboards or armoires are great for storing the necessities for babies and yet they are versatile as the child grows. Consider how you can personalize and decorate these pieces ... try painting the back panel of the armoire a coordinating color or paint the nobs of a dresser or even monogram a headboard. If its too scary to use paint, try our peel and stick monogram nursery wall decals!
Framed art... or try making your own using nursery wall decals.

Dress up your dresser or changing table by painting the knobs!
Well, folks, hope you enjoyed this little post of inspiration :) Don't forget to check out the link for more great ideas! Happy brainstorming!!! And as always, we love to hear your comments or questions here at Kids Decal Corner!


Friday, January 28, 2011

Story Book Inspired Nurseries and How Childrens Wall Stickers Can Help!

I found this idea while I was browsing the internet and thought I'd share it with all of you! It's from Better Homes and Gardens website, entitled " Storybook- Inspired Nurseries". Check out the link for the whole scoop and more great pictures.
In a few short weeks, my husband and I will be welcoming our fourth child to the family! We're  all excited and ready to meet this little one that's been "baking in Mommy's belly", as our 3 year old daughter likes to say.
Having babies and designing your own special nursery are exciting moments in a mom's life! A lot of our customers at Kids Decal Corner are shopping with nurseries in mind. And so, I thought I'd share a little inspiration to get your creativity churning ;)

I love this idea of a storybook inspired nursery! In the example from BHG, they used the book The Twelve Gifts of Birth. What I like about this idea and the pictures, is that the room can grow with the baby... it's done in colors that are suitable for newborns as well as toddlers and even teens! I will say, however, that if they had used childrens wall stickers to do more decorating, it would make their job a bit easier as they transition from one age to the next (how's that for advertising... but its true!).

Here's a few great pointer / ideas from this article:
  • Create a focal point to display the ideas of your storybook. In there example, they used the window seat and built in shelving to display the 12 love characters of this book.
  • Mix and match fabric. Don't lock yourself into "kid - themed" bedding. Use bedding and colors that can transition well from one age to the next. The pink, green, and orange plaid will work well for nursery into teens!
  • Use a quote from the book to either "create" the headboard or to decorate the wall above it. Here is where our Alphabet Wall Stickers or the Wall Wishes Quotes or Nursery Rhyme Quotes would make your job a lot easier and faster!
  • Choose furniture that can grow with your child and that provides a nice neutral background for the more exciting colors and decor of the room and bedding.
Notice the 12 characters of the book surrounding their focal point.

Here's their book quote.

Again, there are tons of kids decal options that would work great for adding some interest around a mirror like this.


If you're looking for some Storybook themed decals, check out:
Pooh and Friends Collection...

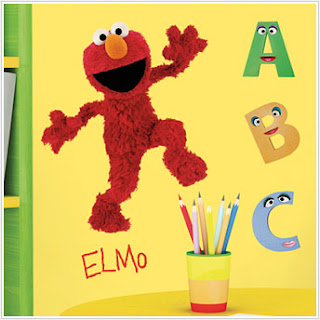
Sesame Street Collection...


And coming soon... Mickey & Friends!!

And so many others ...

Well, I hope you found this helpful.. and check out the link for more great ideas and pictures! Happy Decorating everyone!!

Tuesday, January 4, 2011

Sneak Peak... Childrens Wall Stickers Coming in 2011!!

Wow... the last few weeks went by in a hurry... Christmas .... New Years.... and already it's 2011! It's hard to believe. Hoping you all had a wonderful Holiday season!

Here at Kids Decal Corner, we're excited for what 2011 will hold.  We've got lots of new and excited products coming your way, plus we're anticipating an ever growing business and customer repoire!

So, to wet your appetite a bit, here are a few pics of the new childrens wall stickers that will be coming to Kids Decal Corner this year ...


As you can see, we've got something new and exciting for all age groups ... from nurseries to teens! Some of these decals are cool enough to put in the "non-kid" areas of the house too :)

Stay tuned for these great peel and stick products and many more to come in 2011.
And an especially big "THANKS" to all of you who made 2010 a memorable and profitable year... your trust and business makes us proud!

Friday, December 10, 2010

Gettin' Christmas Crafty With Childrens Wall Stickers - Project # 3

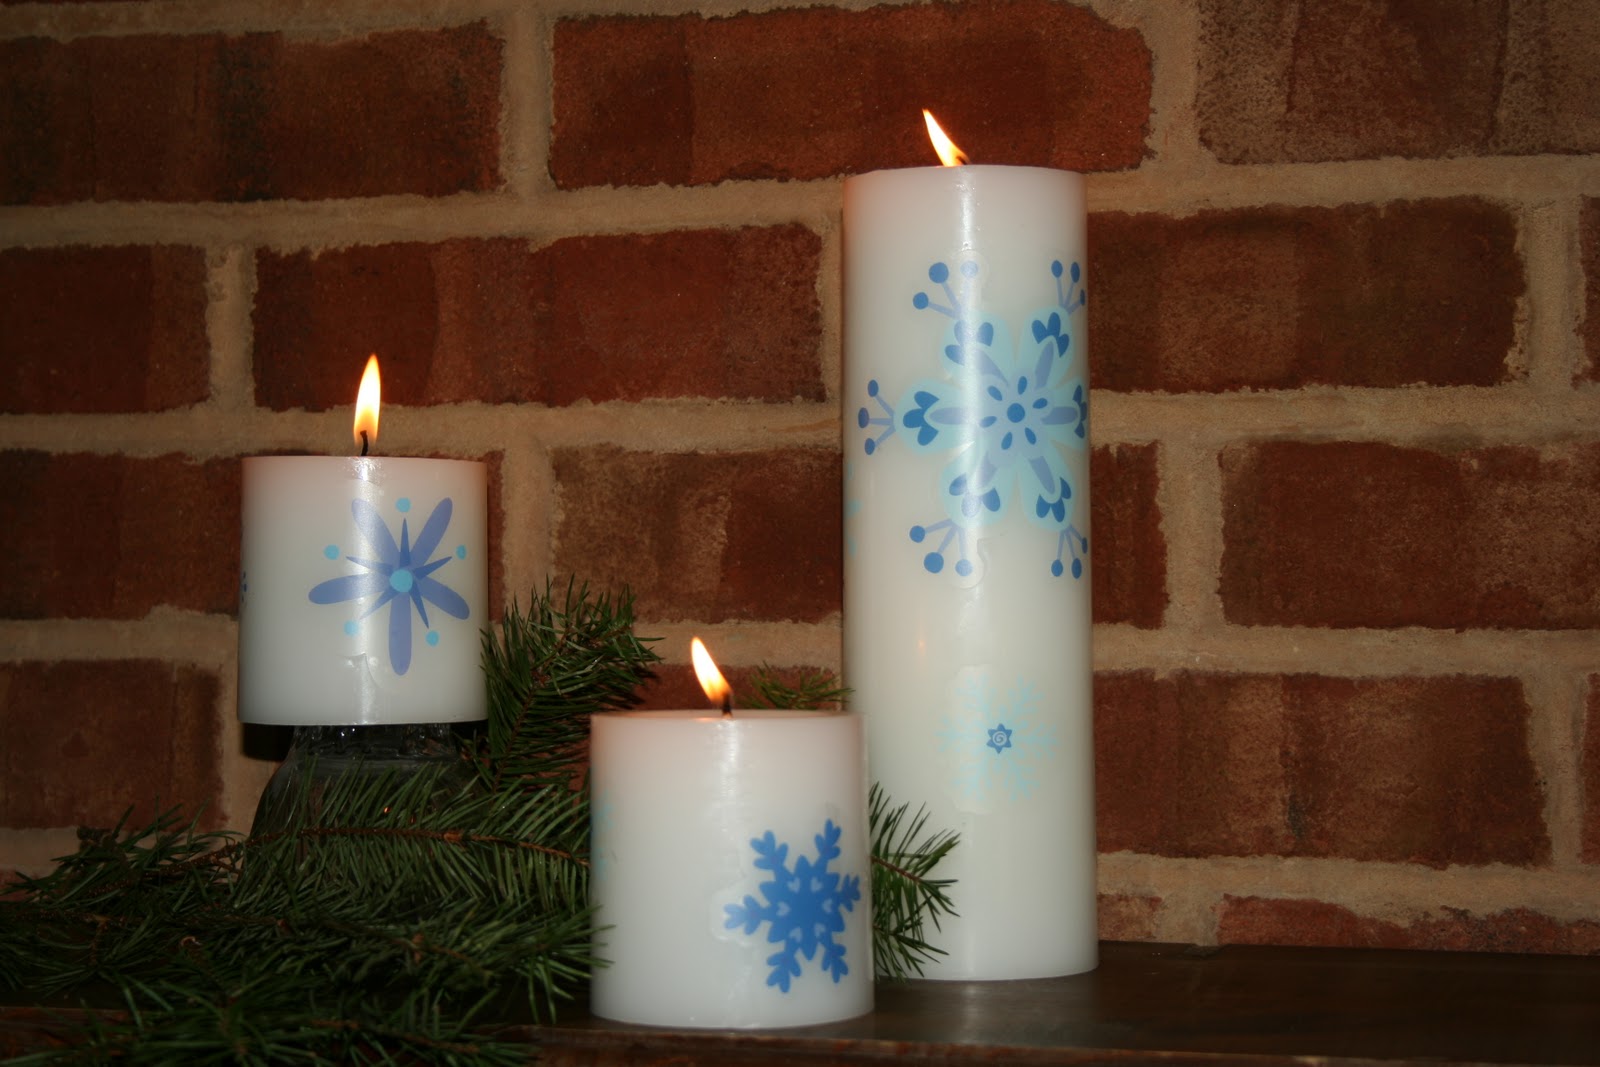
Snowflake Candles!!
Here is our final ( and easiest ) Christmas Crafty project using the Let it Snow Kids Decals.
 This would be a great project for even your toddlers to help with.. it's that easy!

All I did was apply the snowflake decals to white candles. No glue, No mess, No paint... it was that fast and simple!
I suggest using white or cream candles simply because you don't notice the edge of the decal this way. If you go with a darker candle, you will likely see the edges of your decal. 

I think these candles turned out well enough that they would even make a great gift set for a friend or family member! 

This project would work great with the Glitter Snowflakes too!
The other thing I like about these candles, is they're not super Christmasy, so you could easily keep them on display well into the winter months!

Well, folks, that's all the ideas I have for this year! These childrens wall stickers are available for purchase at Kids Decal Corner... Get your orders in while supplies last!!


Monday, December 6, 2010

Gettin' Christmas Crafty With Childrens Wall Stickers - Project 2

Kid's Christmas Garland

Here is project # 2 using the same holiday childrens wall stickers from last week.  Like I've said in so many of my posts, these decals aren't just wall stickers for kids, but can be used in so many fun and creative ways!

This is how I made the garland. This craft project would be great for kids 5 and older.

1. Supplies:
Kids foam sheets in white, red and light green. I purchased these for a few dollars at AC Moore.
Glitter Glue
Ribbon, Jute, Sparkly Star Garland
Mini Clothes Pins
Let it Snow Kids Decals
Scissors
Hot glue gun

2. I applied the stocking and ornament decals to the foam sheets.
Cut out the foam to match the shape of the decal.
I learned the hard way that after applying the glitter glue, it pulled the edges of the decal off the foam backing. I suggest using either foam glue or a hot glue gun to lightly glue down the edges of your decals. This way as the glitter glue dries, it won't pull up the edges.

3. Decorate the decals with glitter glue, sequins, buttons, whatever your imagination comes up with.

4. Apply the decals to the garland ribbon/ jute with mini clothes pins.

5. Attach bows or tinsel or whatever to dress up the clothes pins.


6. Enjoy your kid-friendly Christmas Garland!
Stay tuned for the final ( and easiest ) project using the same set of decals... 
Happy Decorating!!

Thursday, November 25, 2010

All NEW Tangled Childrens Wall Stickers are Here!


Spirited Rapunzel hasn't just come to the big screen... she can bring charm and adventure to any little girl's bedroom with our all NEW Tangled childrens wall stickers!

Check out our new Tangled Giant Kids Decal for only $18.95!
And to get the whole cast, try out our Tangled Kids Decals for $14.95.

Enjoy a little magic with your family this holiday season!

Monday, July 26, 2010

"Out of this World" Kids Decals : Mood Board #3

For this week's Project Runway Monday I'm presenting Mood Board #3, based off of the kids decals "Out of this World". You can use these great decals is so many ways, and this mood board just captures one. This mood board is for a boy's bedroom/playroom. I hope you get many ideas that you can adapt to your own situation!
1. Out of This World  Kids decals, sold on Kids Decal Corner for $41.95.
2. I recommend painting your hardwood floor white (see #5), then painting a layer of dark blue circles to mimic a solar system, and arrange your decals around the circles for a creative display of rockets, planets, and stars. For a permanent option, cover decals and paint with a layer of clear poly to keep decals from rubbing off with the traffic of little shoes.
3. Keep the style of sleek and streamline science going with this black metal loft bed complete with a desk and futon chair below a twin sized bed. This can be purchased online at thebunkbedoutlet.com.
4. Pint colors make a room go from blah to bling! And this pairing of blues is no exception. Try painting the walls this smooth and calming Behr Lovely Blue Sky, a Home Depot color.
5. Paint the trim and floor Behr Ultra Pure White, also available at Home Depot.
6. Try something new and creative by painting the ceiling and about 12" down onto each wall the Behr Navy Blue. Next, use Pottery Barn Kids Glow-In-The-Dark Star Decals over this night sky area to give your space explorer a feeling of sleeping under the stars!
7. Buy this Authentic Models Mobile Solar System by Authentic Models on Amazon and hang each planet from the ceiling. You can even take apart the mobile so that you can spread out the planets over your ceiling.
8. Spread this beautiful bedding set from Land of Nod over your child's bed and they'll have all they need to send their dreams filled with explorations to the moon.
9. Frame the space on your wall where your studying, future NASA engineer will see it, from his work station below his bed.
10. And lastly, gather some large and extra large baskets from places like Michaels, TJ Maxx, or Pottery Barn to stow away rolls of constellation and planet posters, as well as rolls of blank drawing paper and other craft supplies, building blocks, or model supplies.

Well, that's a wrap for this space explorer's mood board. And as always, feel free to take these ideas for using our childrens wall stickers, from http://www.kidsdecalcorner.com and form them into something that will work for your space and your budget! Enjoy!!

Thursday, July 15, 2010

Transform Your Room with our Transformers Decal!

As Hollywood is gearing up to bring us the sequel to Transformers; Revenge of the Fallen, I thought it would be fun to take a look at the super cool Transformers Characters we already have at Kids Decal Corner... "they're more than meets the eye!"

BummbleBee Transformers Decal

Let Bumble Bee be your guardian! This peel and stick transformer decal stands almost 3 1/2 feet tall. What's great about these childrens wall stickers is:
1. They're not just for kids!!! How about you guys out there. Deck out your man room or office with these awesome stickers for wall, mirror, door, locker.... wherever you can find a spot that's big enough!
2. Another great idea... Use them for party decorations! What kid wouldn't be psyched to have these mighty friends at his birthday bash!!!
3. These options are all possible because they come at such an affordable price. Each Giant Transformers Decal is sold separately for $23.95 at http://www.kidsdecalcorner.com!! Can't beat that price for the impact it will bring your room or party!

Optimus Prime Transformers Decal
Then we have Optimus Prime. This autotron stands at 3 feet tall as well. Pair them up and transport yourself to the epic battle of good over evil... Of the Autotrons against the Decepticons!

Transformers Wallpaper Decals

WOW!!! Talk about "more than meets the eye!" These amazing wallpaper decals will transport you into your favorite Blockbuster film in literally minutes! You can apply this wallpaper decal in roughly an hour or two. Click below to see the demo video. This mural is available in 9'x15' or 6'x10' sizes.


These smaller, but equally cool, transformers kids decals have all your favorite characters in one package!
On the Autobots' side: Optimus Prime, Bumblebee, Ironhide, Ratchet, Sideswipe, Mudflap, and Skids. In the Decepticons' corner: Megatron, Starscream, Devastator, Ravage, and The Fallen.
These aren't just stickers for walls, like I mentioned earlier, you can apply them to any smooth surface; furniture, stools, mirrors, lockers, laptops, cars.... just about anywhere you can imagine. 

Transformers Decal

Our Transformers Decal make great gifts for the Transformers Fans you know as well! You can purchase all of these decals at Kids Decal Corner!!!

Monday, July 12, 2010

Kids Decals Make A Baby Gift to Remeber!

Hello, Folks! It's Monday already, Wow, time really does fly. In keeping with our Project - Runway Monday, I decided to show you what I've been up to this past weekend. Some very dear friends of ours just had their second child. As a Baby Gift, I wanted to make them a wall plaque with their precious daughter's initials. The plan was to use some kids decals on the project as well, however, my plaque was too small and looking far too crowded for a decal (disappointing, but I didn't feel like starting over).

I hope though, that you can use this idea as a spring board for the next little baby in your life that needs a sweet welcome into the world gift.

So, here is the run down of how I made this little Baby Plaque.

Step 1:  Gather your supplies. You'll need a wooden plaque - purchased at your local craft stores. This particular plaque is 8x10. I think I would go a bit bigger when I do this again.

Primer - Gray or white
Acrylic paint
Brushes
Pencil
Chalk
Paper plate
 
Step 2: Primer your plaque.
I only used gray primer because it was what I had on hand. If the colors you plan to paint your plaque are light, then go with a white primer. If the colors are darker, you'll save yourself time by using a gray primer because you won't need as many coats to get a true color.

Step 3:  Paint the edges of your plaque the background color of your choice. For this project I used green. Let paint dry!

Step 4: Using a round object, trace half circles... creating a scallop edge... around the outside of your plaque. A few tips: roughly measure out your circles, so that you don't run out of room at the end of the plaque. Try different round objects around your house until you find one that works. I used the bottom of the paint bottles and they worked perfectly.

Step 5: Paint your scalloped edge and the center of your plaque. I suggest 2-3 thinner coats of paint. Let the paint dry! This picture was only after 1 coat of paint.

Step 6: Print out the letters and date from your computer. Pick a font that you like and print it out in the size you want. In order to copy it onto your plaque, rub chalk on the back of the printed paper. Now with a ball-point pen, trace over the printed letters and date. When you're done, you'll have a chalk outline on the plaque of the letters and dates to paint over. The great thing about this is, if you don't get your letters or date centered the first try, you can just wipe the chalk off and go for try #2.


Step 7: Paint in your letters and date with a coordinating color. I used a darker pink. Note: If you don't have all the exact colors, you can easily mix colors to create the shade you want. I used a little red to darken up the pink that I used for the background. Use a fine point brush for the lettering! Don't worry, if you mess up, keep some background color handy and you can fix up your mistakes with a little of that paint. 

Step 8: Add special touches. This is where you could add childrens wall stickers or use part of the mural stencils from http://www.kidsdecalcorner.com  to add finishing touches to your plaque. I was planning on using some flower kids decals, but they ended up being too large for my project. I just free handed these flowers and I think they turned out pretty cute. Remember, you can always cut your decals to fit too.


Well, I had lots of fun creating this sweet baby gift for our friends! I'd love to see what you design and create for your next baby gift - or any other gift, for that matter!!

That's all for this week's Project-Runway Monday! Next week.... MOOD BOARD # 2 coming down the runway! Have a great week!

Thursday, July 8, 2010

New Life Size Princess Kids Decals.... Bringing the magic into your daughter's room!


Disney's new, The Princess and the Frog, lovable characters have just arrived at Kids Decal Corner!!!

This was the first movie that my son watched in the Big theatre with his Pappy! He thought he was big stuff, and I must say, he was. Though he thought it pretty scary at some points (he is only 4), he still loved the music and characters of the film.

If your child, like mine, has a fond place in their hearts for the magic, adventure and love of this new Disney film, then I'm sure they'd be delighted to have these life-size characters visiting them in their room!


With Prince Naveen and Princess Tiana you can create the comical couple that gives life to this movie, right
 on their bedroom walls!
Princess and the Frog;Tiana - 
Giant Princess Wall Stickers

Princess and the Frog; Naveen - Giant Princess Wall Stickers


All of these characters are sold separately, but I must say, for the size of the decal, it's a really good price! Visit us at http://www.kidsdecalcorner.com to view the prices!
Bonus Material: There are twelve 3-D butterfly wall stickers that go along with each childrens wall stickers set! How cool is that!?
                                
These princess wall stickers are from Roommates and like all our decals have their benefits:
  • Quick; go up in minutes
  • Repositionable; move the kids decals as often as you want until they meet your satisfaction!
  • Removable; No sticky residue left behind!
  • Reusable; in case you want to store them away and reuse them at a later date; just peel them off the wall (careful to not get any dirt or debris on the back) and place them on the silicone backing they came on, and you're good to go!
  • Made to last!
  • Affordable!!!

I'm thinking this adorable Princess Medallion would make a great "headboard" for your daughter's bed, don't you?!

Princess and the Frog Medallion - Giant Princess Wall Stickers

The Princess and the Frog, childrens wall stickers, would be great for accenting furniture or mirrors or stools, to coordinate with the theme of the walls. Don't forget... take a look at the different ways you can use these smaller decals to create beautiful art work for walls or doors. Make it personal by adding your child's name! Check out our earlier posts called "Project - Runway Monday; Alphabet Wall Stickers Part 1" for step by step instructions!

Princess and the Frog; Giant Princess Wall Stickers

If your little girl is into princess kids decals , there are many other options at Kids Decal Corner that I'm sure would delight her heart!

Well, folks, that's all the magic I have for now!  Have a great week!

Oh, I almost forgot... stay tuned, because the Disney Princesses are also coming to Kids Decal Corner! I'll be sure to let you know when the Highnesses arrive!