Showing posts with label Wall Decor Decals. Show all posts

Monday, June 21, 2010

Project - Runway: Alphabet Wall Stickers Part 2.... BIG REVEAL!

Last Monday, I gave you step by step instructions on how to use the Alphabet Wall Stickers to make a BIG impact for a LITTLE price! With a few kids decals, a little paint and a few hours of work you can have....

Drum roll please!!!!


Alphabet Wall Stickers - Part 2


A fun and colorful wall that says "Wow" !

Not only will your kids love it, but so will your wallet! Most projects that make this kind of impact can cost LOTS of money! But not this one!


Remember, you can use this same idea with any of the wall decor decals sold at Kids Decal Corner. What works the best, are the smaller, multiples per pack. But, you could also use this sort of idea with the Giant Kids Decals. Your painted block would, obviously, be much bigger than for the smaller decals.

These blocks create a visual background and border for your decals .... Making them look more "finished". Another idea for your Giant Kids Decal Blocks, is to use coordinating colors and paint varying sizes of stripes around the outside edge of your painted block. Just like you put multiple colored mats around a custom framed picture, these stripes can act in a similar manner. So whether they're bigger or smaller, they act as a great accent to your kids decal!


Budget breakdown!

    * Alphabet Wall Stickers: $23.95 ( bought from Kids Decal Corner  )
    * Acrylic Paint bought from my local Craft Store: $4.00 ( $1.00 each... used 4 different colors)
    * Painter's Tape: $2.95 from Walmart

Total money spent:   $30.90

If you have any questions about how to accomplish this project, please refer back to the instructions for Alphabet Wall Stickers Part 2.  If you still need help, don't hesitate to email me at request@kidsdecalcorner.com. I'd love to hear about your project, help you out along the way, and then celebrate your finished product with you when its all done!

So, there you have it.... Two different ways to use the same kids decal to make some fun and creative wall art! Hope you have as much fun as I did with these projects!

Stay tuned for our other fun and beautiful wall art projects.... coming down the Project - Runway!

Monday, June 14, 2010

Project - Runway Monday: Alphabet Wall Stickers Part 2

What do you get when you combine the Alphabet Wall Stickers (from Kids Decal Corner) and some cheerful paint colors???? 
A REALLY cool wall design for a really cheerful price!!!

For this week's Project - Runway Monday Alphabet Wall Stickers Part 2 .... I will walk you through how to use some cute, but simple, kids decals to make an extra BIG impact to your room.

You'll have to tune in next Monday, to get the final pictures... isn't it fun to anticipate :)

First I want to start by saying, you can use any of the wall decor decals that I sell at www.kidsdecalcorner to do this sort of project. I'll say more about how to adapt this project to fit whatever kids decal you might use next Monday.

I did this project with my future play/school room in mind. The room we currently call an "office" is more like a catch all room. But someday.... I have big plans to convert it into a playing/ learning room. However, we're far from being able to put the fun touches (like wall decor) in the room. So for now, I had to be content to try it out in my son's room. He thought it was pretty cool having all the letters of the alphabet on his bedroom wall!

The inspiration behind this project was the desire to create a large visual effect without breaking my meager budget. You can do this by painting colored blocks onto your wall to give the appearance of a collage of pictures. Follow the set by step process below and you too can create a beautiful array of color on your wall for a super cheap price! Who says you have to spend money to have a beautiful room?!

Step 1: Gather Your Supplies!
  • Level
  • Measuring Tape
  • Painter's Tape
  • Stencil Paint or samples from your local paint store would work just as well.
  • Brushes
  • Chaulk


Step 2: Planning!

Its always best to plan out your project before you start marking and painting. Trust me, it will save you time and frustration in the long run... I know from experience :)
  • Lay out all your Kids Decals and pre-determine what colors you will paint each of the blocks of color.
  • Determine how big you want each block to be.
  • Determine what distance you want between your blocks... width and height.
  • Determine where you want this collection of blocks to be positioned on your wall... making sure its centered on the wall. 
For my project with  the Alphabet Wall Stickers... I measured 2 feet from the ceiling to start my first row of blocks. Then made sure that it was centered ( left to right ) on the wall. Because I had a narrow section of wall, I decided to paint 6 rows of four blocks and then put the extra 2 alphabet blocks on the bottom left corner - making row 7 with two blocks. I made each BLOCK 3 inches apart from one another. And each ROW was 2 inches apart.


I suggest - especially if you have multiple decals and blocks - that you use scrap paper and cut it to the size of the block you plan to paint. Tape them to the wall to give you a visual of how that size will look. This way, you can play around with the size and position of your "blocks" before you start marking and painting.


Step 3: Measure, Mark and Tape!
  • Using your tape measure, start measuring your grid of blocks onto the wall. I suggest you start at the top. Measure down from the ceiling your determined distance, mark it with the chalk and then use your level to draw the line for the top of your first row. Now from your first line, measure down your determined distance for how big (long ) your individual blocks are going to be. My blocks were 8 1/2 in. long by 6 1/2 in. wide. Its easiest to do all your horizontal lines first and then measure out and mark your vertical lines. You will end up with a chalk grid on your wall.
  • Once you have a chalk grid on your wall, start sticking the Painter's tape on the OUTSIDE of the chalk lines (see picture below.... notice that the edge of the tape is on the OUTSIDE of the chalk line ).


When you're done taping your grid, it should look something like this. Notice all the blocks you've created with the tape?


 Step 4: Protect Your Edges!
If you've ever used painter's tape before, you know that often paint will bleed underneath your tape.... leaving a messy edge. I have the trick you need!!!!
Before you use the block color , use the original wall color and paint around the inside edge of each of your blocks. This will seal off the edges. So where your paint bled under the tape, you won't notice it, because its the same color as your wall.

Let the wall color dry completely.

Step 5: Paint Your Blocks!
Now using the designated colors, paint each of your blocks. I suggest using two thinner coats, than one heavy coat. Make sure you cover every spot in your taped off block (covering over the wall color that you previously painted ).

Allow the paint to dry completely. Remove the painter's tape and you will have a beautiful rainbow of colored blocks on your wall!!! Give the paint 2-3 days to set before you apply the decals to the blocks.

Step 6: Peel and Stick Your Kids Decals.
The beauty of these wall decor decals, is that you can apply them as many times as you need to until they're in that perfect spot!


Well, that's all for this weeks post on Project - Runway Monday!!! As always, I anticipate your thoughts, comments, questions or any fun and cool ideas you have!

Check us out next Monday to see the final reveal of this project!!! Plus, I'll give you the budget breakdown of how much I spent to create this amazing wall art and other ideas on how to adapt this idea to different kids decals!

Tuesday, May 25, 2010

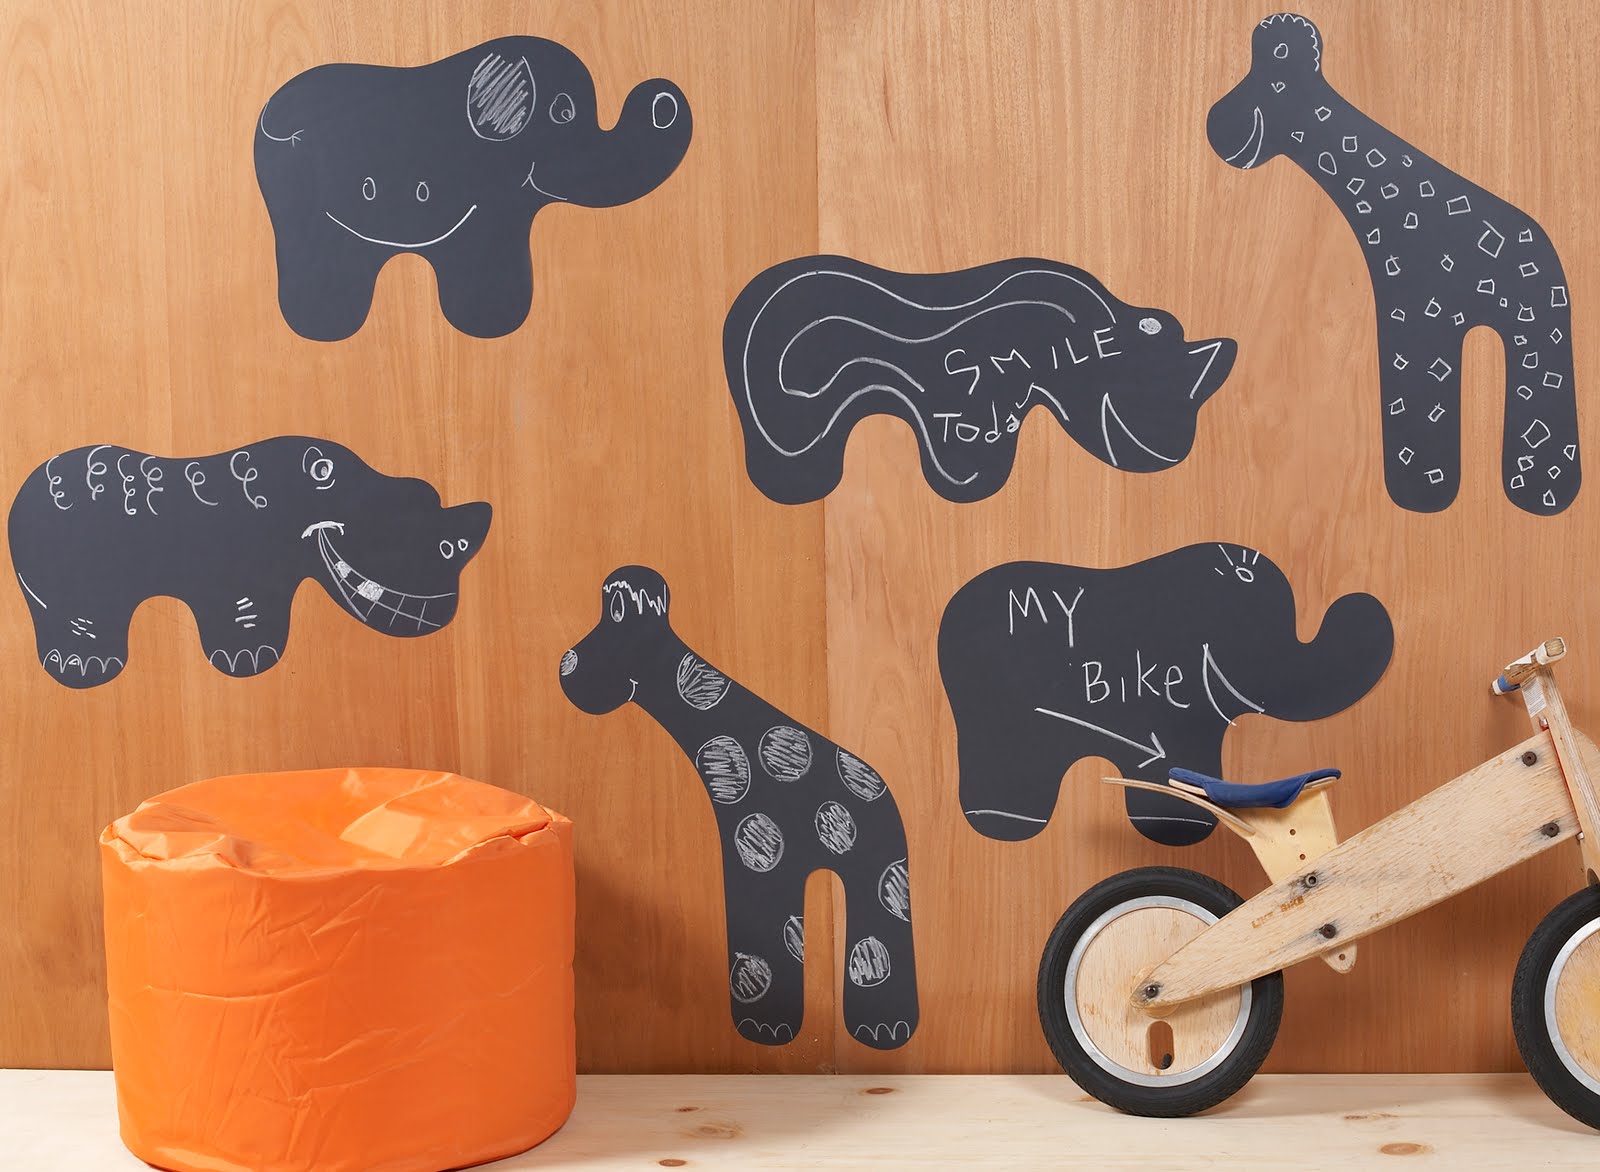
Chalkboard Stickers


It is now officially acceptable to write on the walls!


Chalkboard Stickers are the newest rave when it comes to wall decor decals!

Whether you're looking for a fun way to dress up your child's wall or a way to get organized.... the Chalkboard Stickers at Kids Decal Corner are the way to go!

With these amazing peel and stick chalkboard stickers, you can add creative decor to a room while adding usefulness in minutes.... not to mention.... Its just plain fun to write on the walls!

Simply peel off the kids decal and place it anywhere you like,
  • walls
  • doors
  • lockers
  • furniture
... and start writing. Want to change its location? No problem... just peel it off the wall - leaving no sticky residue behind - and place it somewhere else! When you're ready for a clean slate, just wipe with a damp cloth and its good as new!


Chalkboard stickers are a great way to go Green. No more paper "To Do" lists or little bits of paper floating around with notes or appointments on them. Our peel and stick chalkboards are very environmentally friendly too. The chalk that comes with the decals is allergen free. containing No:
  • Latex
  • Dairy
  • Casein
  • Egg
  • Gluten
  • Peanut
  • Tree Nut
  • Soy


Who would have thought that you could encourage your child's creativity - through writing or drawing, help them get organized with their schedules or classes and express their unique taste and interest .... all with a WALL DECAL???

Visit us at www.kidsdecalcorner.com and you'll see we have a great variety of chalkboard stickers for kids and the kid at heart!

Don't forget these decals make great gifts too! How about that high school senior that will be graduating and moving off to college? Chalkboard stickers would be a great way to celebrate this new season of adventure and responsibility in their lives.


Tuesday, May 11, 2010

Kids Decal Corner... Open For Business!


WoW... After many weeks of hard work, I am proud to say...

We're Open, For Kids Wall Decals

At Kids Decal Corner we recognize that kids are always changing and growing. If you want to keep up with their ever-developing interests and passions is can be expensive, not to mention, time consuming! At Kids Decal Corner we have the perfect solution.

Our wall decor decals are nothing short of miraculous!
They're FAST... simply peel, stick and enjoy!
They're REMOVABLE and REUSABLE... No sticky residue when you take them off!
AFFORDABLE... can be as little as $15!

As your child grows and changes, simply peel off the old wall decor decals and put up the new ones! Its that simple. No Mess. No Repainting. No Hassle. No Weekend - Warrior Projects. Not only are you being kind to your wallet, but you'll have a beautiful room that reflects your child's unique personality and likes and passions!

When you shop at www.kidsdecalcorner.com you'll find categories for every age, from Babies to Teens.
We have a great selection of small and large kids decals; including
  • dinosaurs,
  • trains,
  • cars,
  • sports,
  • Diego,
  • Batman,
  • Spider-Man,
  • Transformers,
  • Star Wars,
to name a few for the boys. For the girls; we have
  • Barbie,
  • Hello Kitty,
  • Princesses,
  • Fairies,
  • Butterflies,
  • Flowers,
  • Dora the Explorer,
  • My Littlest Pet Shop

and so many more.

We're also very proud of our Mural Stencils and Paint by Number wall murals. These, obviously, aren't peel and stick decals, but they are amazing all on their own. For a very affordable price, you can create your child a dreamland mural... even if you're not an artist. From jungles and farms to flower gardens and silhouettes you're sure to find a mural that will delight your child's heart and inspire their imaginations!